How to Check Your Assigned Tickets
To see your assigned tickets, you need to create a custom view. Start by clicking on Add View, then select Account to assign. This will filter the list to show only tickets assigned directly to you.
(Click image to enlarge)
How to Re-assign Tickets (for TLs)
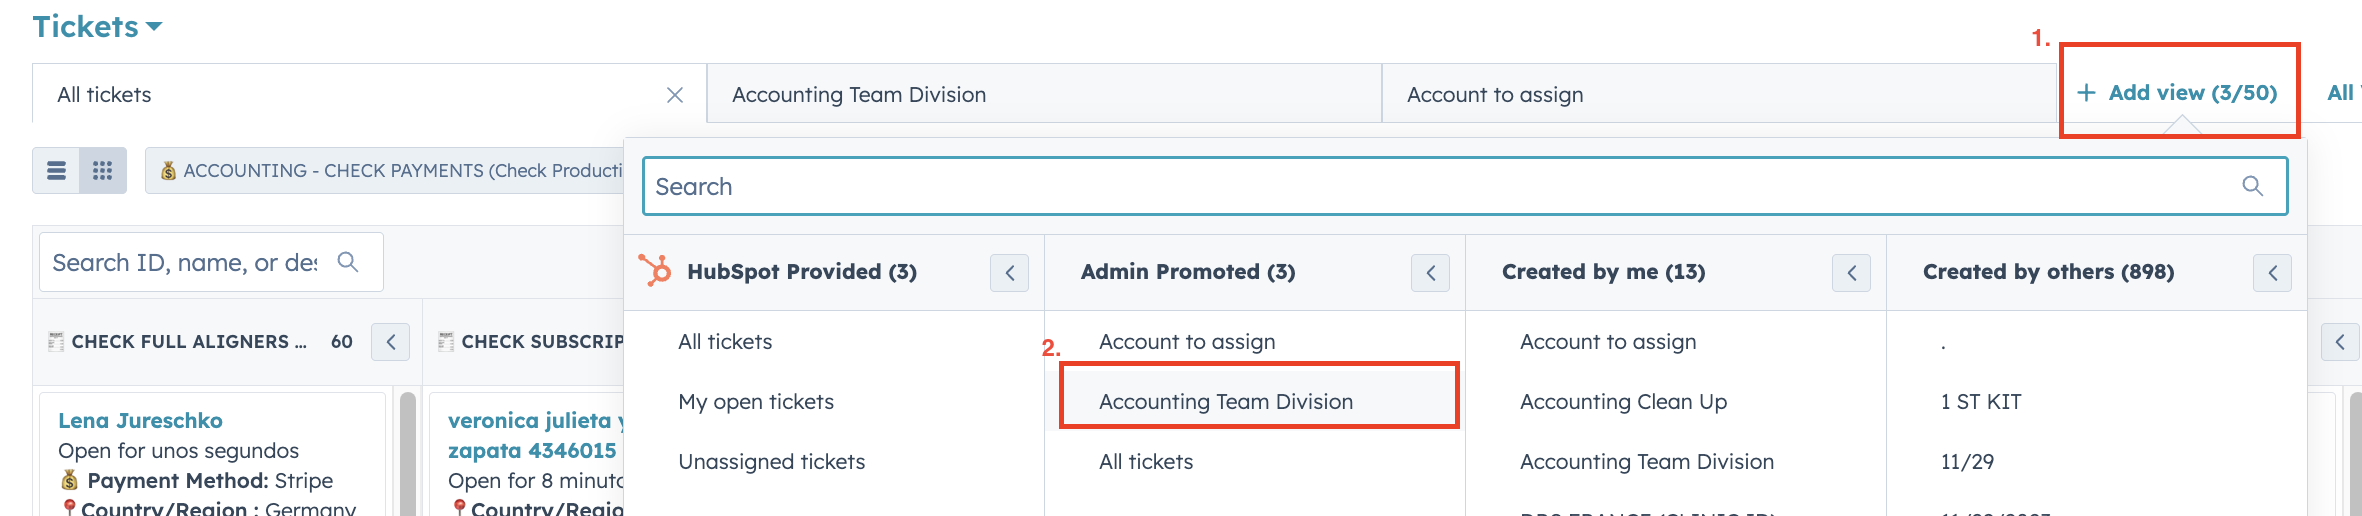
First, navigate to the main tickets dashboard. Click on + Add view to start creating a custom filter.
(Click image to enlarge)
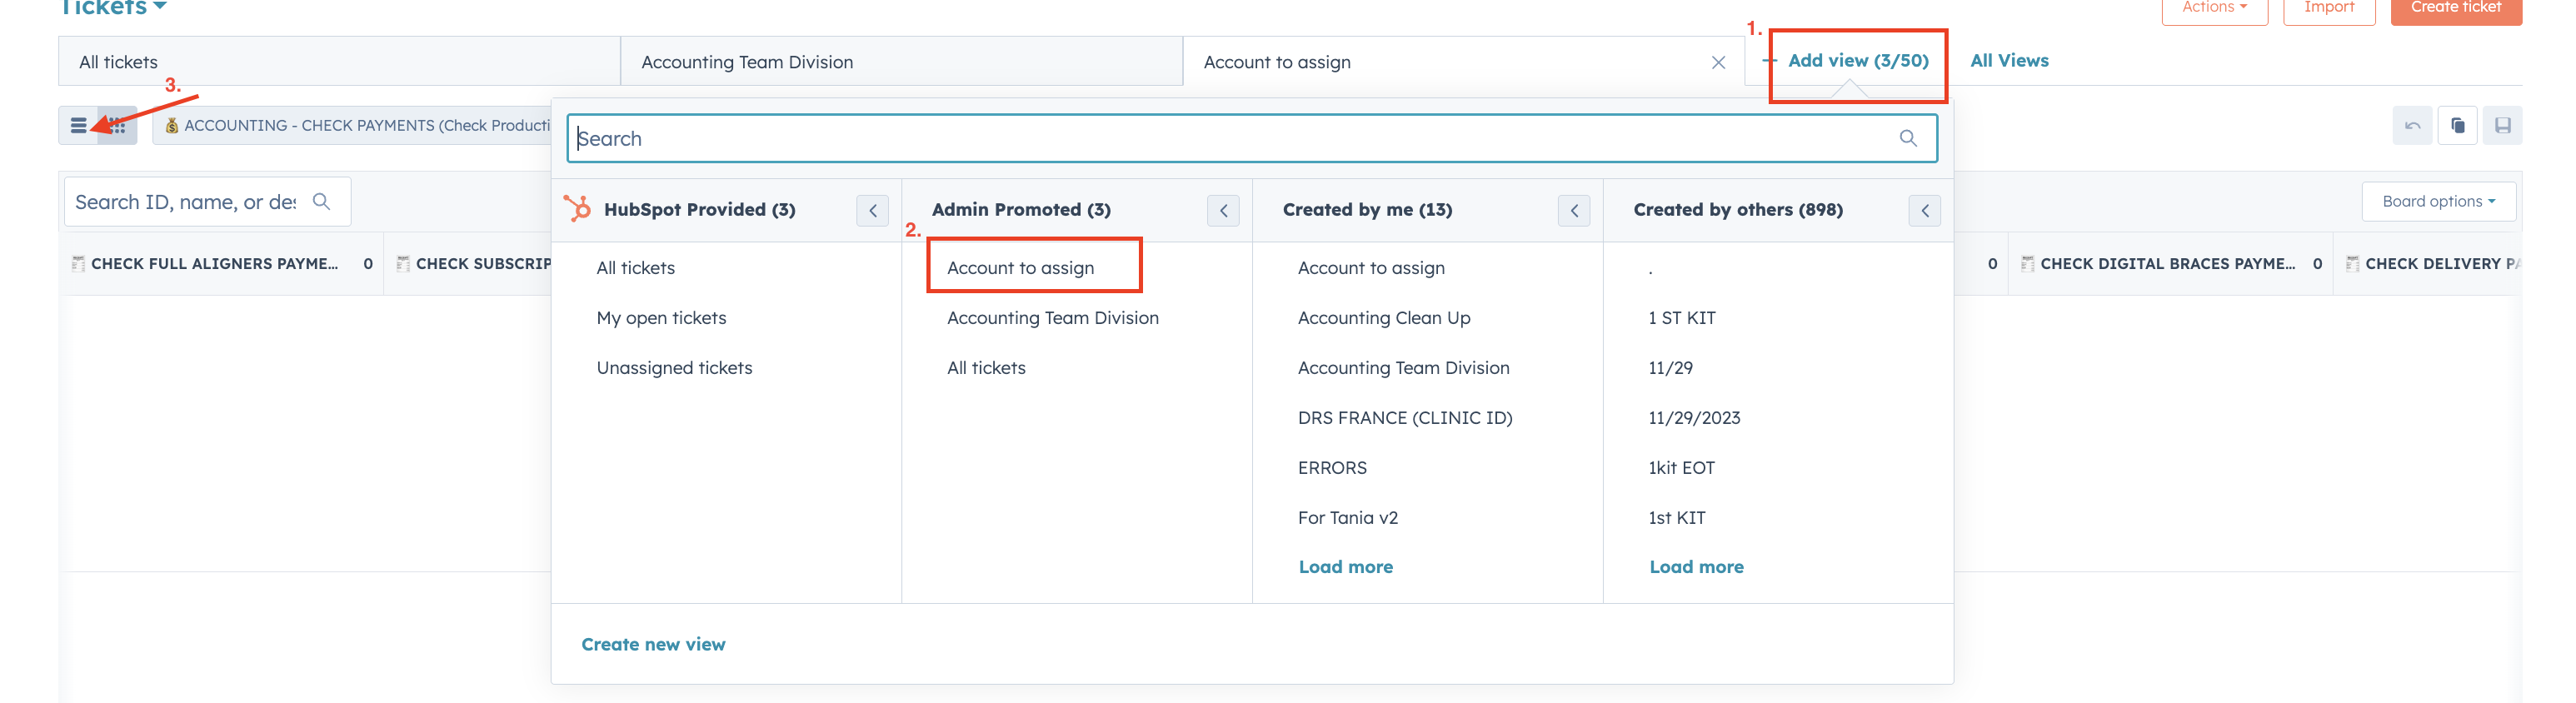
From the list of available views that appears, select Account to assign. This view is pre-configured to show tickets that are pending assignment.
(Click image to enlarge)
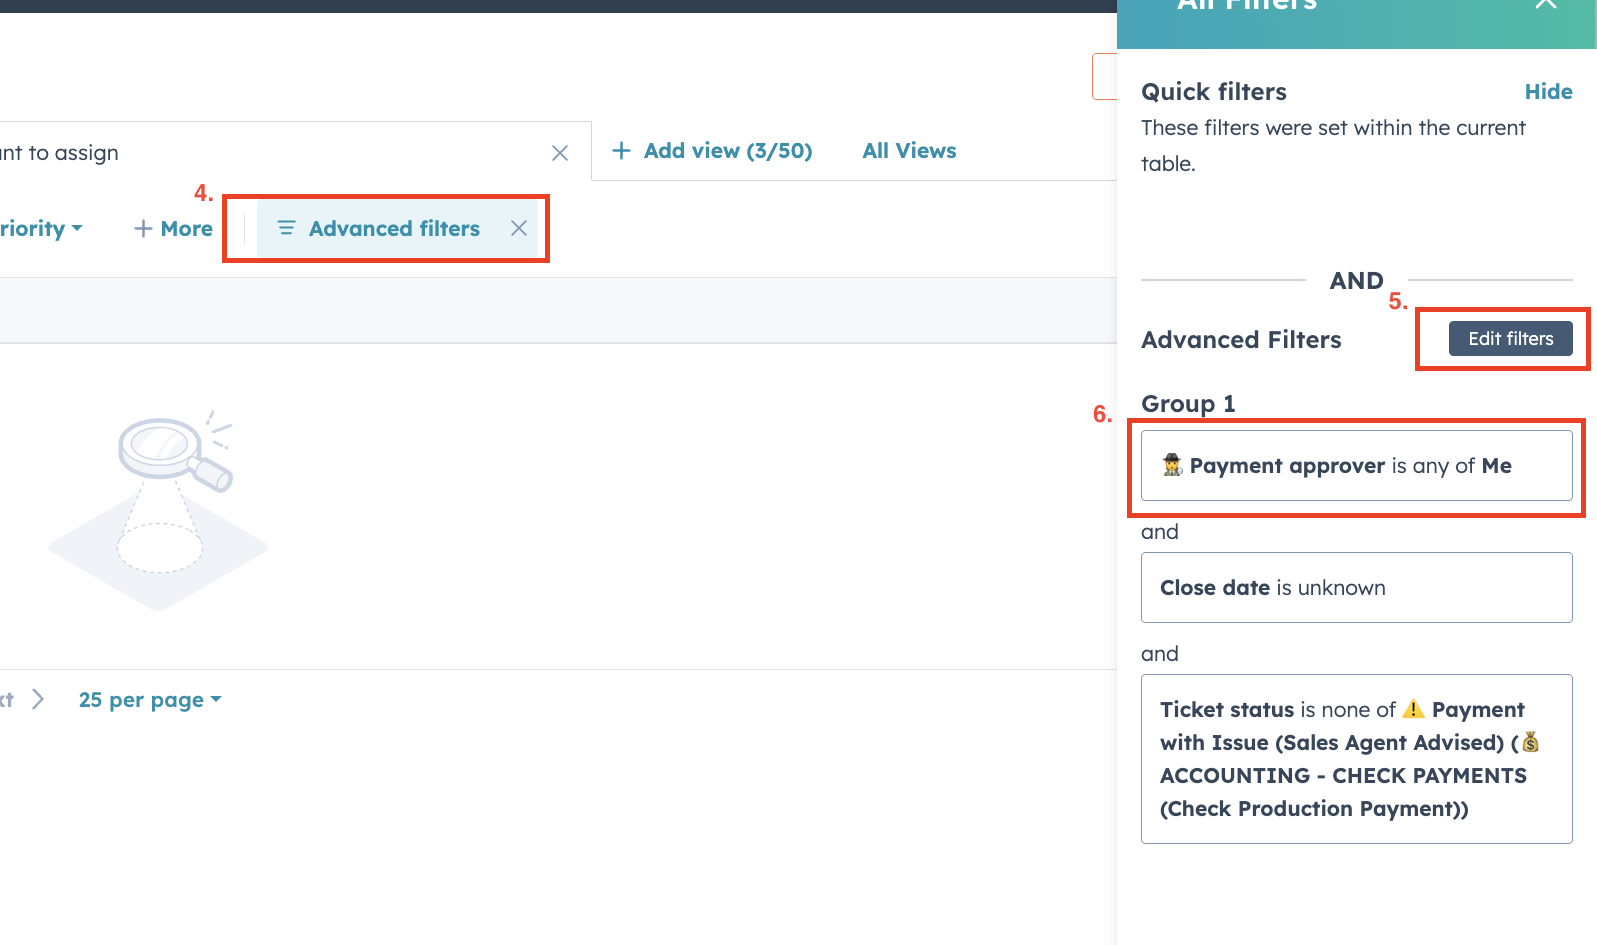
To narrow down the tickets to a specific person, click on the Advanced filters button.
(Click image to enlarge)
The filter panel will appear on the right. Click the Edit filters button to modify the criteria.
(Click image to enlarge)
In the filter settings, locate the Payment approver field. Click on it and change the selection from "Me" to the name of the team member who is away.
(Click image to enlarge)
The list will now show only the tickets for that user. Select all the tickets you need to re-assign by clicking the master checkbox at the top of the list.
(Click image to enlarge)
After selecting the tickets, a toolbar will appear at the top of the list. Click on the Edit button to begin the bulk update process.
(Click image to enlarge)
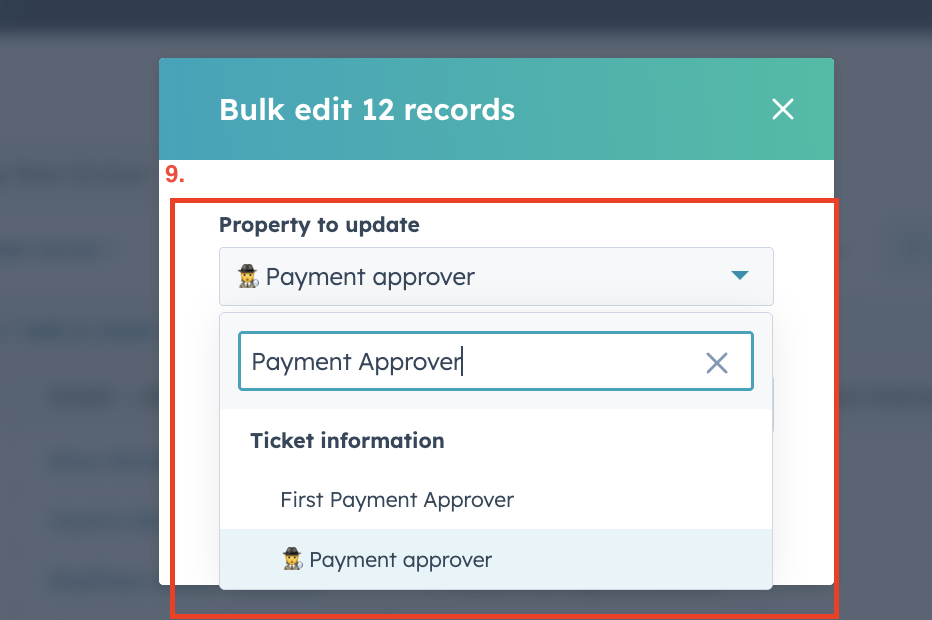
A "Bulk edit" window will pop up. In the "Property to update" search box, type and select Payment approver.

(Click image to enlarge)
Another dropdown menu will appear. Click on it to see a list of team members.
(Click image to enlarge)
From the list, select the name of the person you want to assign the tickets to.
(Click image to enlarge)
With the new assignee selected, click the "Update" button to finalize the re-assignment.
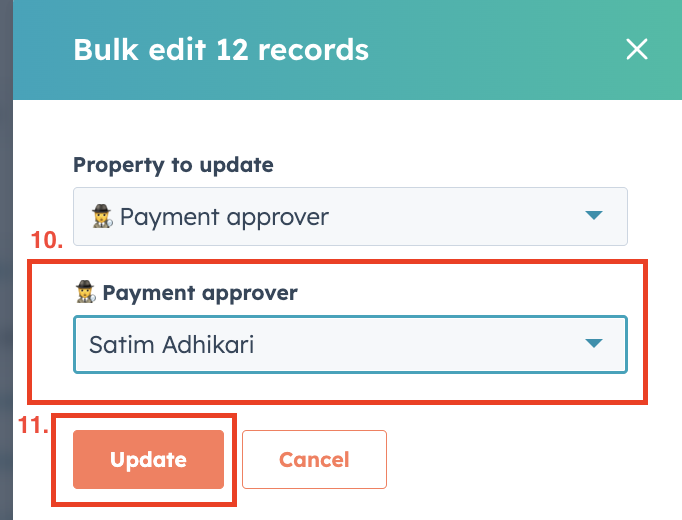
(Click image to enlarge)
Live Reports Dashboard
Click the button below to view the live reports dashboard on HubSpot. This provides real-time data and insights on ticket metrics and team performance.
View Live Report